PostX Review – Best Plugin for WordPress Post Blocks
Are you looking for an honest PostX review? Or wondering if PostX is the best plugin for WordPress post blocks? If so, then you’ve landed at the correct place to know that.
WordPress is an amazing platform for creating blog sites. A huge dilemma that bloggers face is the way to display their posts to their audience. And for that, the blogging features in WordPress are not enough. So, WordPress offers tons of plugins that you can use to enhance the blogging experience.
Among these, PostX is a great plugin that allows you to show your blog posts in the most appropriate way. It adds post blocks on your native WordPress block editor for your blog site’s easy and attractive formation.
However, you might have a question, is it the best plugin for WordPress post blocks? You’ll get to know that in this detailed PostX review.
So, without further delay, let’s begin.
A) PostX – An Overview
PostX is a highly customizable Gutenberg post block plugin for WordPress. It adds different kinds of post blocks for your blog pages. This makes your blog look more attractive and professional.
Note that, you can use this plugin to make a variety of blog pages. Such as news, magazines, travel, personal blog, fashion, and more.
And guess what. You also have the ability to use the post blocks within the Elementor plugin. That means you can easily edit the blocks within Elementor.
Not only that, but you can also convert the blocks into a shortcode. Now, you can use these blocks inside other page builder plugins like Divi Builder, Beaver Builder, etc. through the shortcode.
Plus, PostX is fully compatible with the WPML (WordPress Multilingual) plugin and Loco translation plugin as well. It means your site can be translated over multiple languages.
Not to mention, it works perfectly with every Gutenberg compatible WordPress theme. And there are more exclusive features in it which are detailly discussed in the next section.
B) Key Features of PostX
As a freemium plugin, it consists of different free and premium features. Among them, the list below shows some of its key features. So, let’s check these features.
1. Readymade Starter Packs and Block Designs
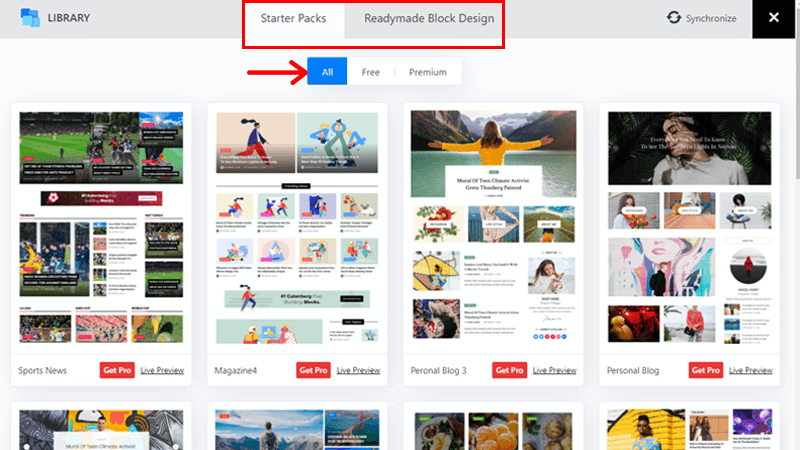
The block library of PostX contains 9+ readymade free and premium starter packs. You can have a preview of them and choose the one that’s suitable for your blog post and pages. After inserting it, you can easily customize it to make your site distinct.
Moreover, it also has 88+ ready-made block designs. This makes it easy for you to add desired sections to your post and pages.
Plus, each of the blocks contains different layout variations for your sections. This enables you to choose the one that fits your site.
Not only that, but you’re also able to make your own template and save them for future use.
2. Advanced Query Builder
PostX enables you to show your content based on different criteria. You can also choose to display from a certain taxonomy or post type.
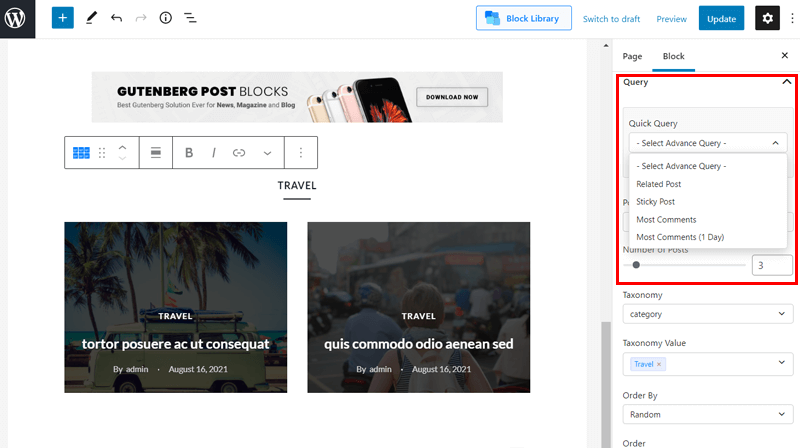
The advanced query builder feature enables you to create a complex query for your post grid. You can create them for each block without needing to write any code.
There are already certain pre-built queries available like Most Comments, Most Popular, Latest Posts, etc. You can also change them as per your need.
3. Exclusive Archive Builder
The premium version of PostX contains the exclusive archive builder feature. It allows you to create archive pages for your categories, tags, authors, and more. Plus, there are multiple customization options to customize it as per your need.
You can also use the block library for the layout of the pages. But firstly, for using this feature, you need to activate it from the Add-ons option on the PostX menu.
4. Ajax Powered Post Filter
The posts can be filtered based on category using the category filter tool. Such post filter options are powered by Ajax technology. Using it, you can filter a certain block area instead of an entire page. This enables you to show all of your content even in a small area.
Now, your visitors are able to select a category and easily read the posts on that category that they are interested in.
5. Advanced Pagination Options
There are 3 kinds of advanced pagination options present in PostX. They are default pagination, load more, and next/previous. You’ll find these options as a common element for post lists and post grids.
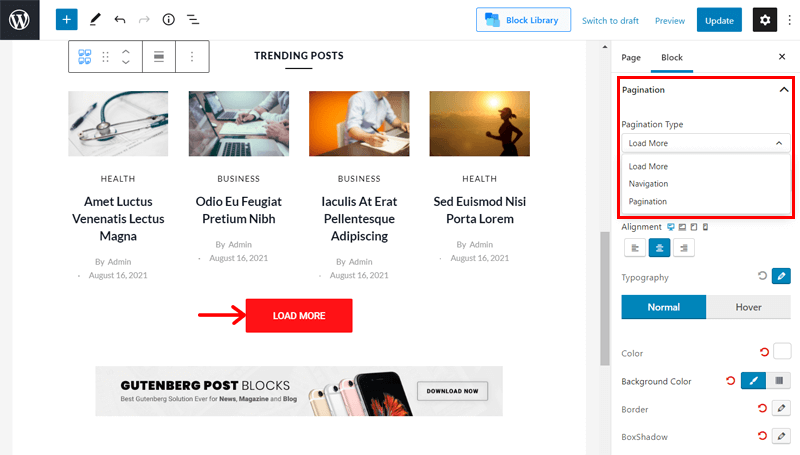
Since Gutenberg post block grids are Ajax-powered, the content loads even without reloading the page completely. So, when using these paginations, a certain part of the block loads by replacing the previous content of that block.
6. Flexible Customization Options
Typography is a major highlight of blogs. So, there are tons of Google free fonts and settings for awesome typography in PostX.
Similarly, you can find multiple flexible customization options for shadow, spacing, margin, color, and more.
Another interesting option is content animation. You can find attractive animations available in PostX. You can add such visual effects to emphasize your content.
Plus, you can also add lazy loading to your images. This’ll provide your audience a better experience even when images take some time to load.
7. Available Add-ons
There are add-ons available in PostX for adding extra functions to it. The free version of PostX contains Elementor Addons and Saved Templates.
Elementor Addons enables you to use Gutenberg blocks inside Elementor as mentioned before. Similarly, Saved Templates allow you to create layouts, get their shortcode, and use the layout anywhere.
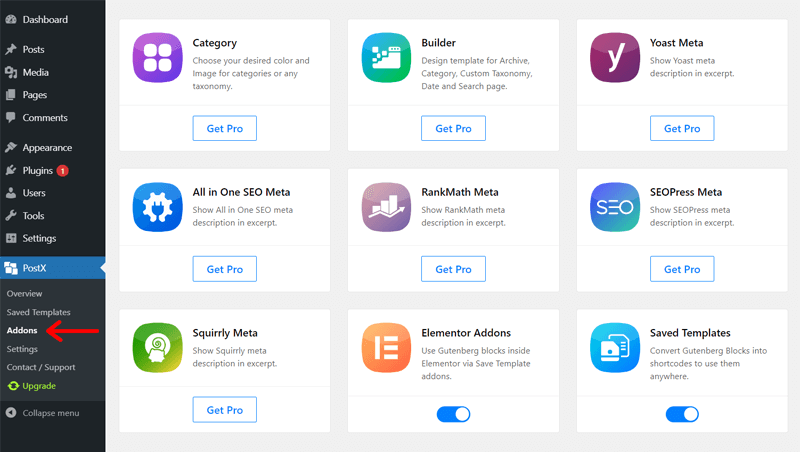
Whereas the premium version consists of 7 more add-ons. Using the Category addon, you can set the color and images for the taxonomy like category and tags. Another add-on is Archive Builder that I had discussed before.
Apart from them, there are add-ons that display the meta description of SEO plugins. That is for Yoast SEO, Squirrly SEO, Rank Math, SEOPress, and All in One SEO.
C) How to Install and Setup PostX Plugin?
If you’re thinking of using this plugin, then at first, you must install and set up it on your WordPress. For that, simply follow these steps.
Step 1: Install the Plugin
For the installation, first of all, you need to log in to your WordPress dashboard. Then, click on the Plugins section. There you need to go to the Add New option.
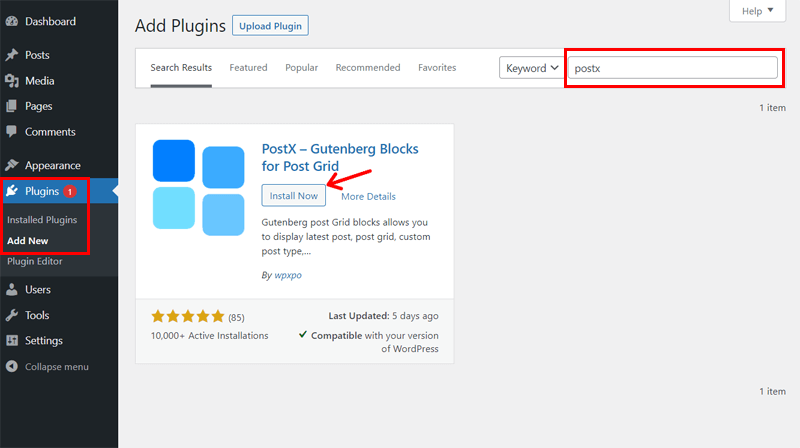
Here, at the top right side of this section, there’s a search box. You can type the keyword ‘PostX’ in the box and click enter to search for that plugin.
On the list, you can find the ‘PostX – Gutenberg Blocks for Post Grid’ plugin. You must click on the Install Now button for the plugin to start the installation.

When the installation completes, it shows the Activate button. You need to click on that button to get PostX activated on your site.
Step 2: Setup the Plugin
As soon as the activation completes, an Overview section displays from PostX. You can also see a new menu ‘PostX’ added to your dashboard.
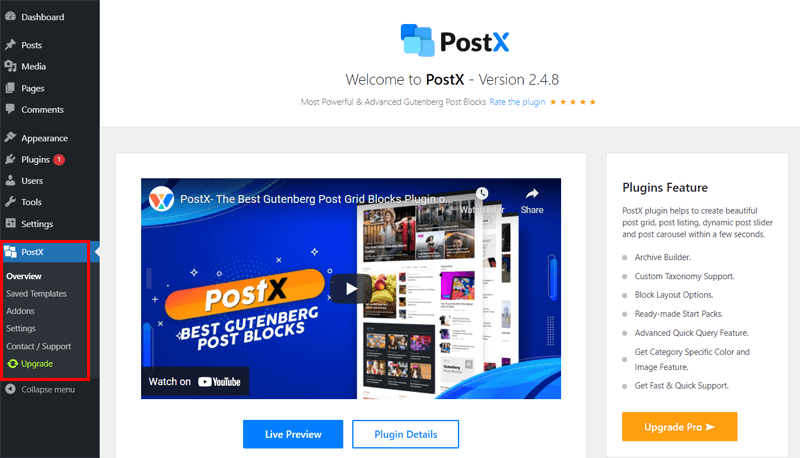
Along with the Overview section, there are other sub-menus also available in this PostX menu. Each of them is helpful to perform their respective functions.
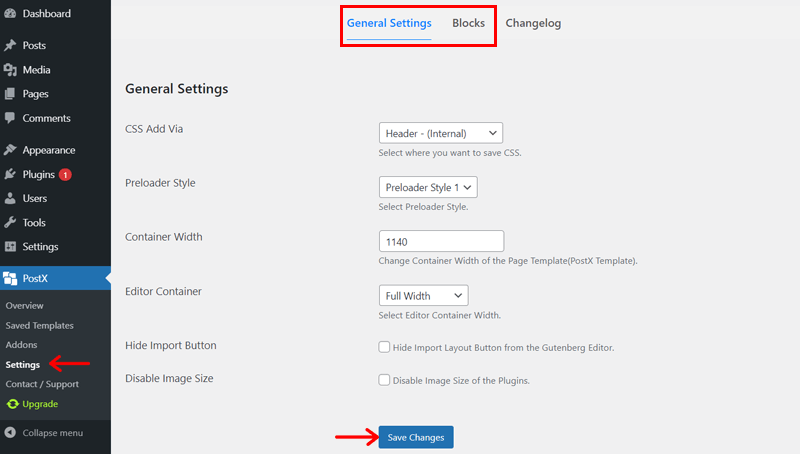
There’s also a Settings section in which you can find the General Settings and Blocks option. There you can change the settings and criteria as per your need for your site. But it’s not compulsory.
Don’t forget to click on the ‘Save Changes’ button for saving the changes in settings.
D) How to Create a Blog Page Using PostX?
Now, I’m going to show you how to use this plugin to create a blog page. It’ll be done using the available starter pack and block design in PostX. While doing this, I’ll also discuss the basics of its user interface.
Note that, you need to first create and publish your blog posts for different categories. This will provide you with ease in understanding the plugin more.
After that, follow these steps serially.
1. Add a Starter Pack Template on the New Page
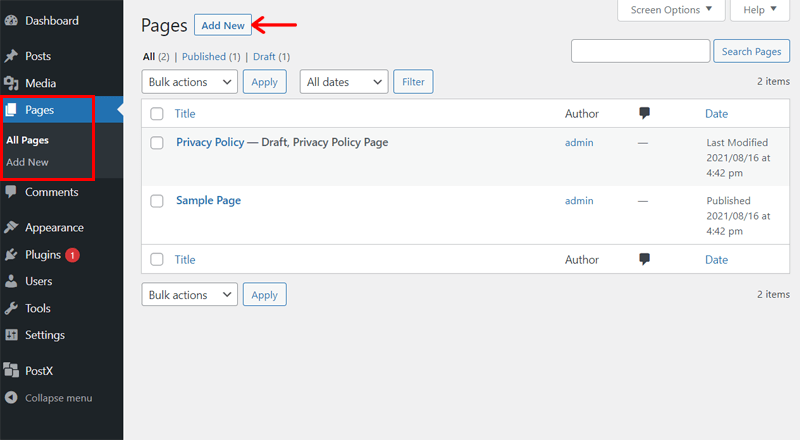
The first step is to create a new page for the website. For that, click on the Add New option available in the Pages menu of the dashboard.
That’ll open the WordPress native Gutenberg editor. There you can add a title for the page like ‘Blog Page’. At the right side of the Page section, there’s the Page Attribute menu. It contains a Template option in which you must choose ‘PostX Template’.
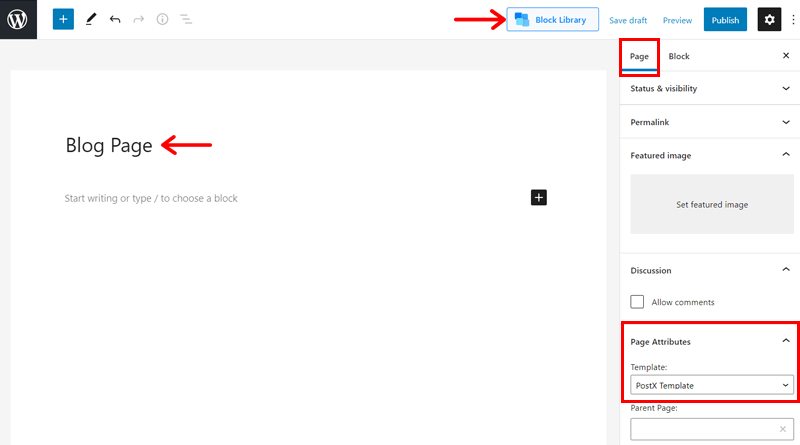
Now, you need to click on the Block Library button present at the top right of the menu. In the library, you’ll find the starter packs and ready-made block design options. Each of which contains free and premium options for different kinds of websites.
Among the different templates in the Starter Packs section, choose one for your blog page. You can also see the preview of the template from the Live Preview option. After you decide on the one for your blog, click on the Import button.

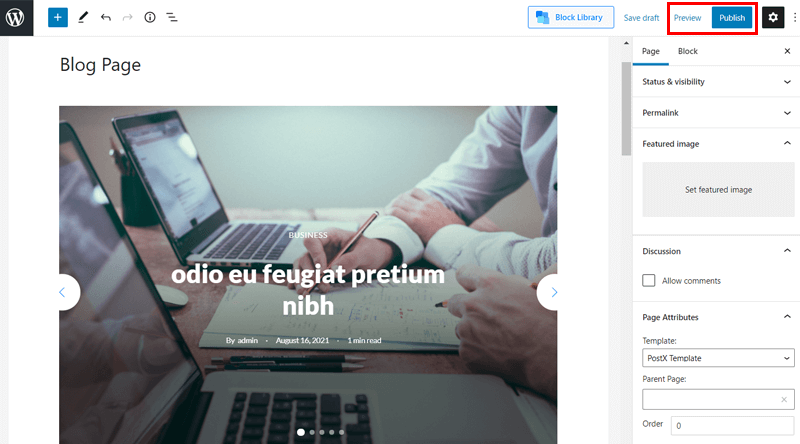
After a while, the template displays on the editor with your blog post contents. Before doing anything else, it’s best to save your work until now. So, you can publish the page by clicking the Publish button. Now, you can also have a preview of the page from the Preview option.
2. Know the User Interface

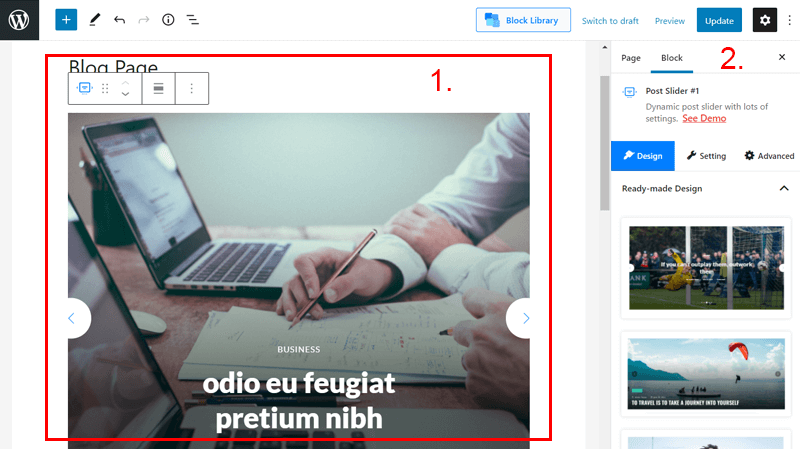
Before moving forward, now let’s have a quick overview of the user interface of PostX. After the blog page gets inserted, there it forms 2 sections in its user interface. They are:
Left Side Section
The left side is the front-end live preview of the page. As the template is already added, now you can select the post blocks here and customize them on the right side section.
When you select a block, you’re able to see the options and settings of the Gutenberg editor on the left side. Such as the option to change block styles, drag or move the block up or down, etc.
Along with that, you can also add a new section or remove the existing block as per your need. In that new section, you can also add the readymade section blocks. The process is the same as inserting a template.
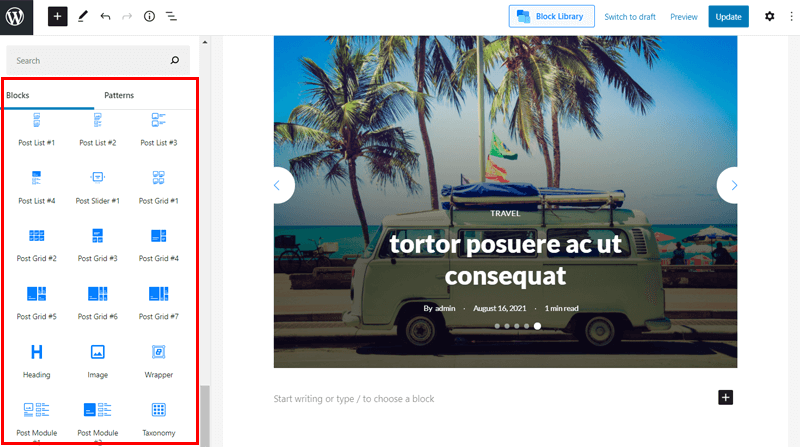
Or, you can click on the Browse All button when adding a new block. Then, on the left side of this section, you’ll see the 18 attractive post blocks that you can create from PostX. They are:
- Post List: There are 4 post lists to show your posts in a list.
- Post Grid: It consists of 7 post grids to show your posts in a rectangular grid.
- Post Slider: A post slider block allows you to show the glimpse of your posts in a slider.
- Image: It enables you to add the images and enhance them with various options.
- Wrapper: You can use it to focus your content with eye-catching design options.
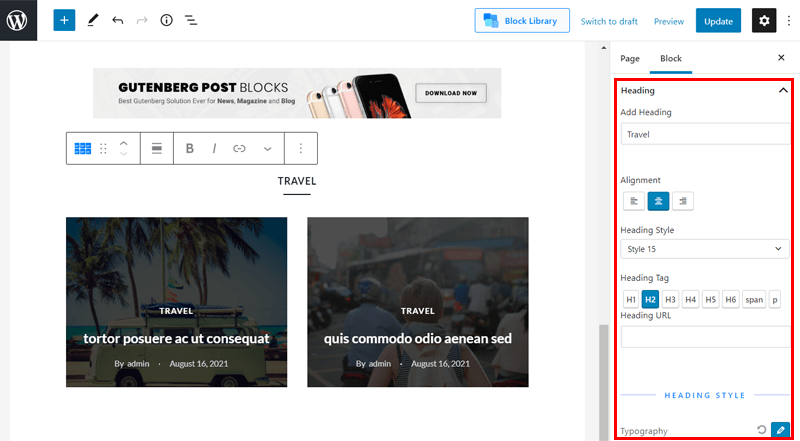
- Heading: You can have more customization options when you add this block for your page heading.
- Post Module: There are 2 post modules to show your posts in other different ways. Specifically, 1 row can have 2 columns with different numbers of posts displayed in each.
- Taxonomy: It allows you to show the contents based on category and tags.
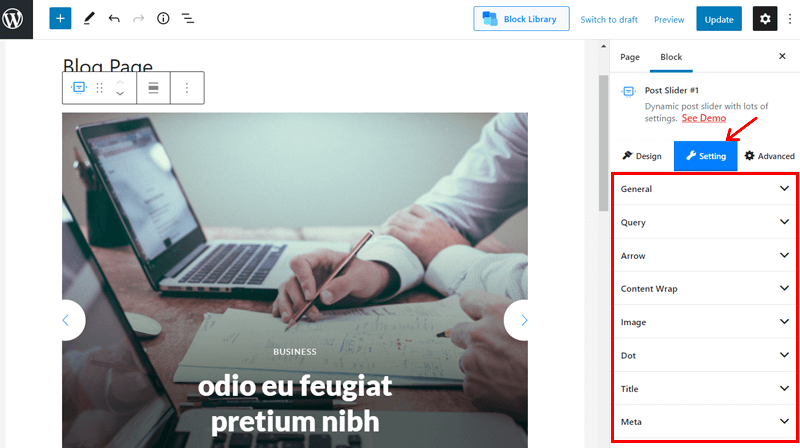
Right Side Section
When you click on a block on the left side, on the right side, there’s the Block section. The options and settings here are added by PostX for customizing the post blocks.
At first, you’ll find the block style mentioned of the block selected with a demo option. After which there are 3 options available. They are:
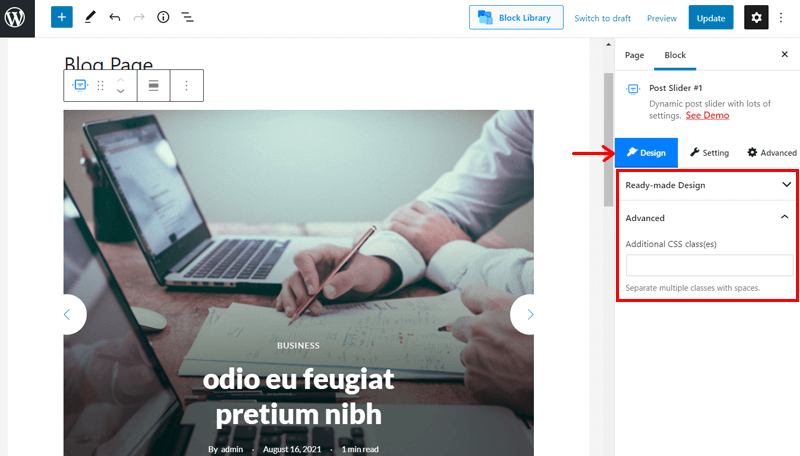
(I) Design
The Design option normally contains 3 essential things. They are:
- Layout: It contains multiple layout designs for the block design.
- Ready-made Design: It consists of other new block design suggestions.
- Advanced: Here, you can add additional CSS properties to the design.
(II) Settings
Here, there are tons of settings for the customization of the post blocks. The settings change depending upon the type of post block you select.
The common settings include Heading, Title, Meta, Category, Image, and more that are for the specific contents. Apart from them, some of the other important settings are:
- General: Here, you can enable and disable the different contents of the block to show or hide. There are options to set the number of columns, column gaps, alignment, and more.
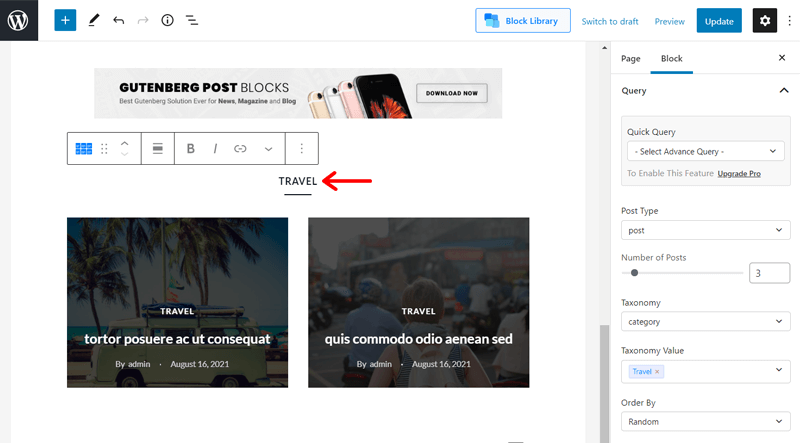
- Query: You can use the pre-designed query to show your content based on criteria. Also, you’re able to display based on certain post types or taxonomy.
- Content Wrap: This option allows your block contents to look more attractive. It includes customization options like background color, border, border-radius, padding, etc.
- Excerpt: Excerpt settings allow you to manage the display of the post excerpt. You’re able to limit the display of words and customize the color, typography, and padding.
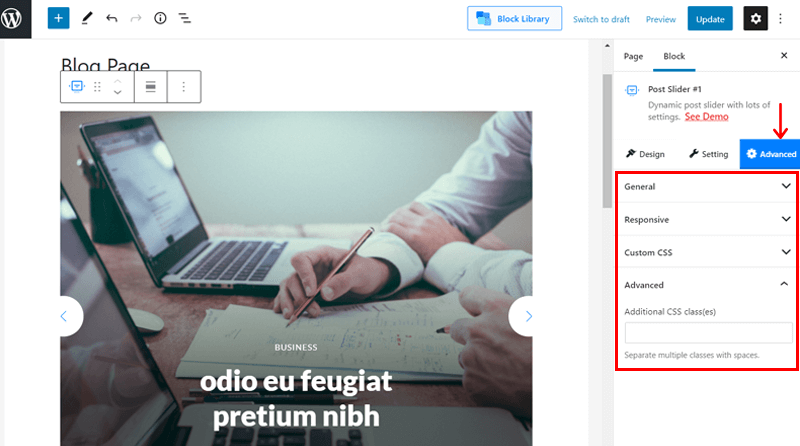
(III) Advanced
Based on the design you’re using, there are certain advanced settings available here. They are:
- General: It contains customization options for a block like background color, margin, padding, box-shadow, and more.
- Responsive: Here, you can hide a block on different screen sizes.
- Custom CSS: It contains a text area where you can add your custom CSS.
- Advanced: Here, additional CSS classes can be added.
3. Customize Your Blog Page
This plugin makes your blog page itself from the posts that you’ve published. And it looks ready to be used. However, to match your personality, I recommend you to customize the blocks.
You may have understood the basics of the user interface and customization options available in PostX. So, you can now start customizing your blog page. You can change the layouts, category of the posts to be displayed instead of that in the template or add new blocks.
You just need to click on the block on the left side and change the settings and options on the right side. For the heading of a block or texts on buttons, you can also edit the text from the left side easily.
For the image blocks like ads, the right side section option varies. So, for such images, you can click on the image at the left side. Then you’ll find the options to change the image and other customization options on the right side. Using it, you can keep your images the way you like.
After the customization finishes, don’t forget to click the Update button for saving the changes.
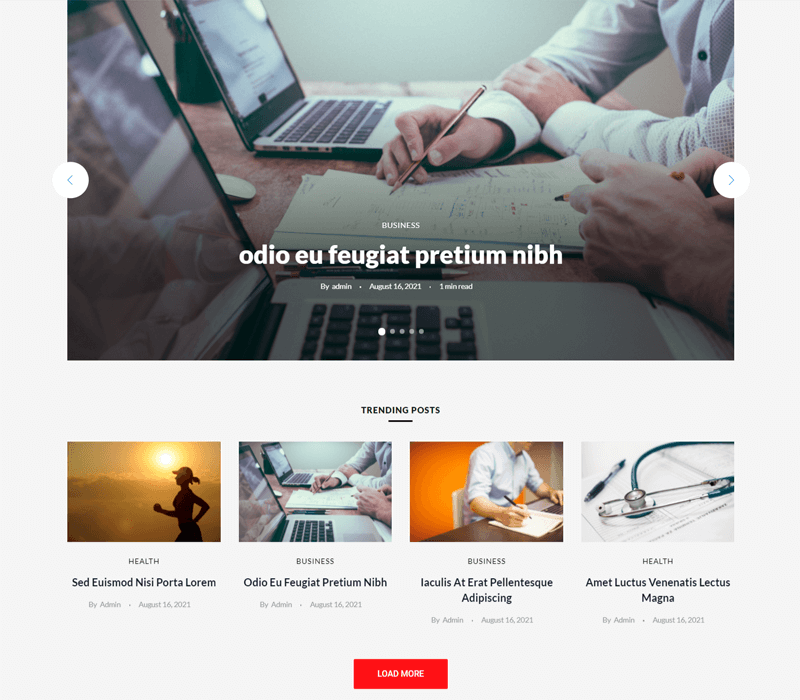
4. Preview of the Blog Page
Lastly, I’ve also shared the image of the blog page that I’ve created using the PostX plugin below. It uses an attractive template, blocks, and with simple yet stunning customization. Isn’t it amazing that the page is ready to use within minutes!
If you haven’t used it yet, then give it a try. You can follow these steps to understand and build your blog page easily.
E) Pricing of PostX
You can easily download the free version of PostX from WordPress.org. In case you’re looking for the premium version, then not to worry. The pricing plans of it are also quite affordable.
The 3 pricing plans of PostX consist of all the premium features. Each of them provides 1 year of support and updates for the yearly purchase. Whereas in the lifetime purchase, you’ll get lifetime updates and support.
So, the plans are rather divided based on the number of sites that you can build. The plans are:
- Personal: The Personal plan is for creating 1 site and costs $41/year. You can have a one-time payment of $126.
- Unlimited: The Unlimited plan allows you to build unlimited sites at a price of $79/year. For lifetime use, you can purchase it for $244.
- Professional: The Professional plan can be used to make 5 sites of price $67. It costs $199 for the one-time payment.
Plus, if you don’t want the extension within 14 days of purchase, you’ll get a 100% refund of your money.
F) Customer Support Options in PostX
PostX is an easy-to-use plugin. However, if you’ve any query or issue, you can easily get the answer or solution from its customer support options.
For the free version, you can check its Support Forum on WordPress.org. There you can ask your queries and you’ll probably be getting your answers in no time.
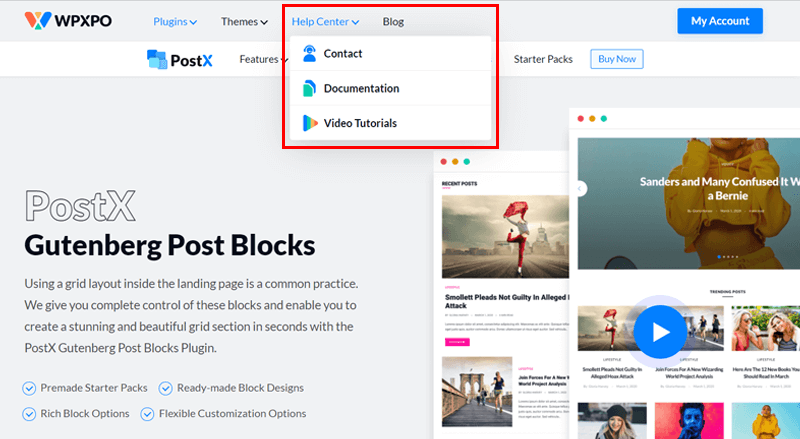
Plus, the official website of PostX consists of a Help Center section. Here, there are different support options given for its users. The best way to know about this plugin in detail is from its documentation. It includes the guidelines and a detailed explanation of its functionality.
Similarly, you can also find video tutorials provided for PostX. That’ll help you to learn more about the customization in PostX.
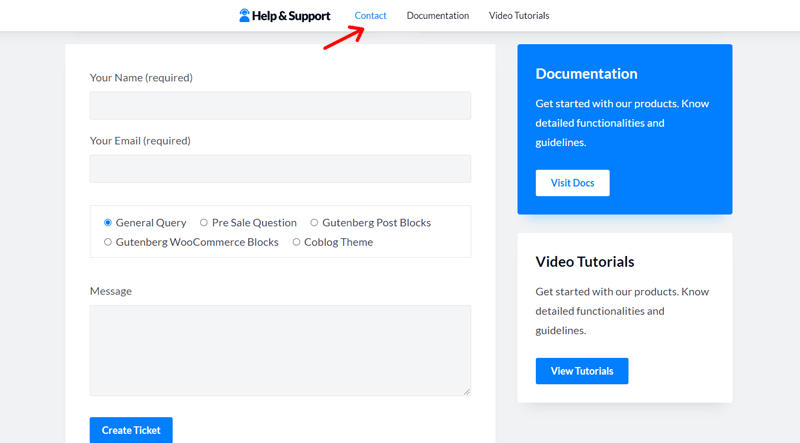
If you’re using the premium version, you’ll also get quick support from the team and developers. For that, you can send your name, email, category of question, and message in the Contact option.
Finally, there’s also a Blogs section where you can see the tutorial and news blogs written related to PostX. This can provide you with the latest updates and knowledge from the experts about the plugin.
G) Pros and Cons of PostX
You must know that along with many advantages, there are some limitations of PostX as well. So, the pros and cons of PostX that I found are:
Pros of PostX
- Good customer support.
- Compatible with Elementor.
- Contains pre-made shortcodes.
- Delivers frequent updates.
- Works well with all Gutenberg compatible themes.
- Flexible customization options.
- Consists of yearly and lifetime payment options.
Cons of PostX
- The features and functionality can overwhelm beginners.
- Most of the block library templates and blocks are present in the premium version.
H) Final Verdict – Is it the Best WordPress Post Block Plugin?
After going through this review, you may have known by now that PostX is an amazing post-block plugin. Here, we got to know that it contains a variety of features. These features make the blog page and blog posts look stunning.
While using this plugin, it also clarifies that the user interface is also simple and highly intuitive. So, even if you’re a blogger, content creator, or beginner, you can easily use this plugin. And, you won’t have to worry about managing how your posts will display.
However, I also recommend you install the plugin and use it by yourself first. That’ll help you to know the functions of the plugin in a better way. Then, if there’s any confusion, you can easily get your answers from its customer support options.
Conclusion
That’s it! You’ve reached the end of this PostX review article. I hope that you liked this review on PostX and agree with the things I’ve mentioned here.
If you’ve more questions, simply post them down in the comment section below. I’ll try my best to guide you with a quick response.
If you are a theme developer and want to increase themes functionality, then they will provide you developer license as well. Contact me if you need any additional help.
You can also read more of the articles on full site editing and how to fix breadcrumb markup in WordPress. Also, see how to add table of content in WordPress using blocks.
Lastly, don’t forget to follow me on LinkedIn and Twitter to get updates on such articles and themes related to the news.
Do you want an honest review of your favorite plugin? Write your comment below. I will try to write an honest review of your plugin.


Leave a Reply